
It’s more than just the roofing shingles; it’s the precise nail placement that secures them. A single misplaced nail can compromise your entire roof, making it vulnerable to wind damage and costly repairs. At The Shingle Master, we believe in “Protecting What Matters,” and that starts with getting the fundamentals right in Clayton, NC. This guide will walk you through why hitting the wind warranty zone is non-negotiable for a secure and long-lasting roof.
Understanding the Wind Warranty Zone on Roofing Shingles
When you invest in high-quality roofing products, you’re also investing in the manufacturer’s promise of performance, which is often tied to a wind warranty. This warranty isn’t automatic; it depends entirely on a correct installation, and the nailing zone is at the heart of it.
Think of the wind warranty zone as the bullseye on a target. Hitting it ensures your roofing system has the strength to withstand high winds as advertised. We’ll explore what this zone is and how manufacturers design shingles to make this target easier for professionals to hit.
What Is the Wind Warranty Zone and Why Does It Matter?
The Wind Warranty Zone is a specific area on roofing shingles designed to provide optimal wind resistance. Properly understanding this zone ensures effective nail placement, enhancing structural integrity and prolonging roof lifespan, which ultimately protects your investment against severe weather conditions.
How Manufacturers Design Shingles for Optimal Nailing Areas
Durability and performance are at the forefront when manufacturers design asphalt roofing shingles. By incorporating designated nailing zones, they ensure that roofing contractors can achieve optimal nail placement, which significantly enhances wind resistance. These larger nailing areas, often indicated by markings or patterns, promote proper installation techniques, allowing shingles to adhere firmly under strong winds and heavy storms. This thoughtful engineering not only protects the integrity of the roof deck but also extends the longevity of the entire roofing system against potential wind damage.
The Importance of Proper Nail Placement for Wind Resistance
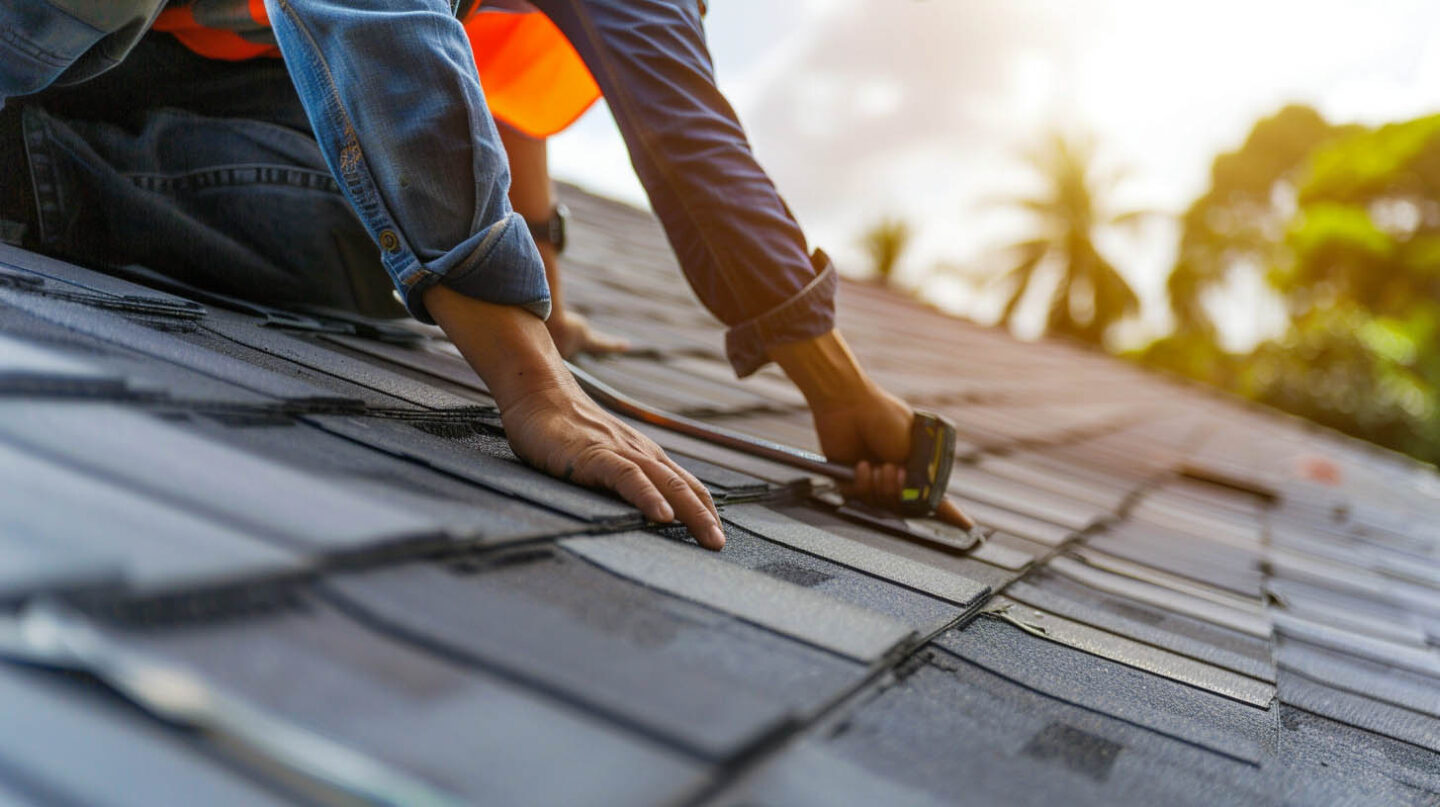
Correct nail placement plays a pivotal role in enhancing wind resistance for asphalt shingle roofs. The strategic positioning of roofing nails within the designated nailing zone ensures the shingles remain securely attached during strong winds and heavy storms. Improper nailing, such as placing nails too close to the edge or utilizing the wrong number, can lead to challenges like wind damage and significantly reduce the roof’s ability to withstand adverse conditions. Ultimately, proper installation is vital to the longevity and durability of the roofing system.
How Nail Position Affects Wind Protection and Roof Longevity
Strategic nail placement plays a crucial role in enhancing wind resistance and ensuring the longevity of roofing systems. Correctly positioning nails within the larger nailing area optimizes the performance of asphalt roofing shingles against strong winds and heavy storms. Inadequate nailing, such as placing nails too high or too low, can lead to poor nailing experiences resulting in roof damage over time. By adhering to manufacturer guidelines and recognizing the common bond of shingle layers, contractors can effectively mitigate potential wind damage.
Common Mistakes & Consequences of Incorrect Nail Placement
Incorrect nail placement often leads to increased vulnerability to wind damage, significantly compromising the roof’s integrity. Poor nailing can disrupt the common bond among shingle layers, resulting in a lack of wind resistance. Many roofing projects falter due to installers placing nails outside the designated nailing zone, exacerbating risks during heavy storms. Over time, these mistakes may lead to costly repairs or even premature replacement of the entire roofing system, undermining the years of experience expected from a qualified roofing contractor.
Identifying the Correct Nailing Zone: Visual Cues & Guides
So, how can you be sure you’re hitting the right spot? Thankfully, manufacturers don’t leave it to guesswork. Modern roof shingles are designed with clear visual cues to guide the placement of roofing nails, making the job more precise for professionals.
These manufacturer’s markings are easy to spot once you know what to look for. They serve as a roadmap for a successful installation, ensuring every nail contributes to the roof’s overall strength. Let’s look at how to locate these guides and the steps to follow for proper nailing.
What’s Next
In conclusion, understanding nail placement within the Wind Warranty Zone is crucial for ensuring the longevity and effectiveness of your roofing system. Proper nail positioning not only enhances wind resistance but also safeguards your investment against potential damage caused by high winds. By following the guidelines provided, you can avoid common mistakes that may compromise your roof’s integrity. At The Shingle Master, an award-winning GAF Master Elite Contractor with a BBB A+, Haag Certified Inspector credentials, and NC Licensed General Contractor status, we’re committed to protecting what matters most to you through superior roofing solutions built on craftsmanship and trust. If you’re ready to elevate your roofing strategy, don’t hesitate to get quotes from us!
Frequently Asked Questions
How many roofing nails per shingle in a high wind zone?
In most situations, four roofing nails per shingle are sufficient. However, for areas prone to high winds or on roofs with steep slopes (over 60 degrees), manufacturers and local building codes typically require six nails per shingle. This increased number of nails provides extra holding power against strong uplift forces.
When roofing, what is the proper method for nailing shingles?
The proper method for nailing involves driving the nail straight and flush with the shingle surface within the manufacturer’s designated nailing zone. The nail must fully penetrate the roof deck by at least 3/4-inch or go completely through it by 1/8-inch. Avoid overdriving, underdriving, or angling nails.
Read our blog: Hot Attic, Cold Rooms: Diagnosing Roof-Related Imbalance